In this article, you’ll learn how VS Code connects to a remote MCP server, where trust boundaries sit, and how to troubleshoot the transport. That matters because useful AI integration depends as much on explicit trust and verification as it does on model capability.
Summary
This guide walks you through the process of connecting a Model Context Protocol (MCP) remote server to Visual Studio Code (VSCode). You’ll learn what MCP is, why it’s useful, and how to set up and use an MCP server to provide richer, real-time context to AI-powered tools like GitHub Copilot.
What is Model Context Protocol (MCP)?
Model Context Protocol (MCP) is an open protocol that standardizes how applications supply context to large language models (LLMs), similar to how USB-C standardizes device connections. It enables AI tools to integrate with local and remote data sources, supporting agent workflows, flexibility between vendors, and secure handling of user data. MCP follows a client-server architecture with hosts, clients, and servers working together.
For more information, see the Model Context Protocol website.
Why Use an MCP Server?
An MCP server acts as a bridge between your development environment and AI tools. It streams real-time context about your workspace, allowing AI assistants to provide more relevant and accurate suggestions. This is especially useful for:
- Keeping AI tools up-to-date with your latest changes
- Improving privacy by standardizing what context is shared
- Enabling interoperability between different editors and AI services
Step-by-Step: Adding an MCP Server in VSCode
Get the MCP Server Code
Download or clone the MCP server implementation from the MCP Server repository.
Open the Agent Pane in VSCode
Move to the Agent pane and press the tools icon:
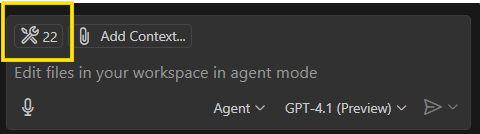
Add More Tools
This will open a list of available tools. Select the
+ Add More Toolsoption: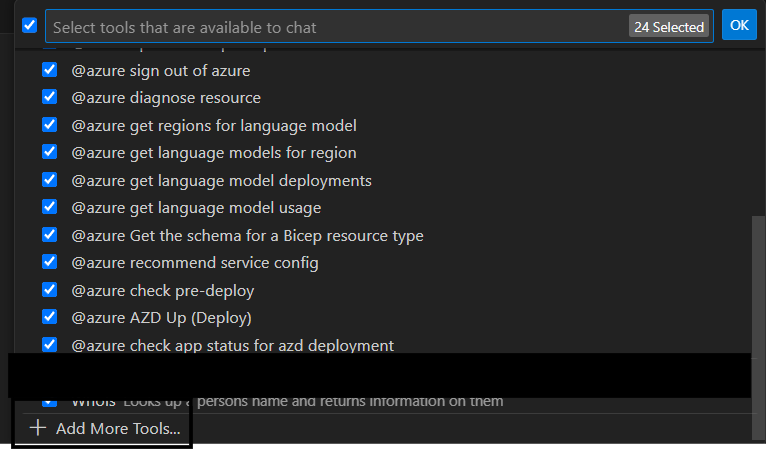
Add MCP Server
Click on
+ Add MCP Server...: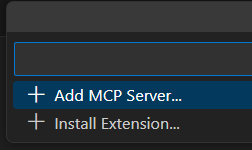
Select Server Type
Since MCP servers uses HTTP to push real-time events, select the highlighted HTTP Server option:
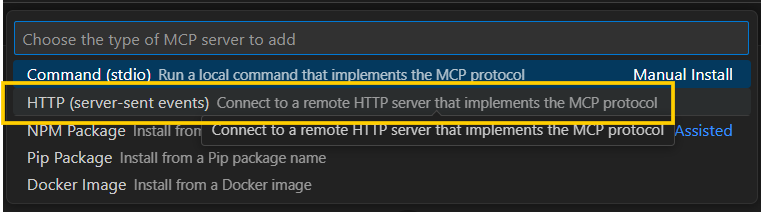
Enter Server Details
Enter your MCP server’s URL and a unique ID. After this, a new server entry will be created in your
.vscode/mcp.jsonfile: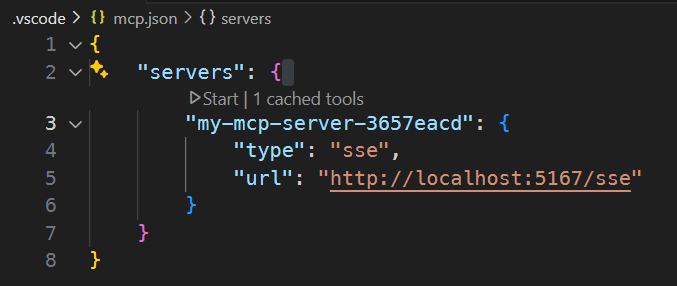
Start the MCP Server
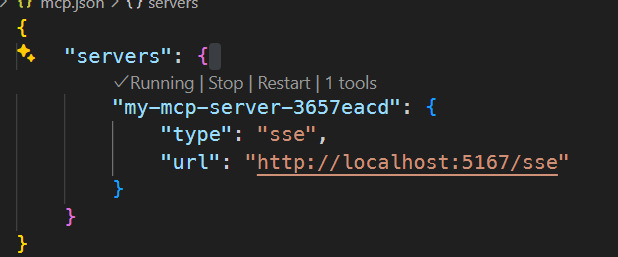
Press the start button to activate the connection:
Interact with the Agent
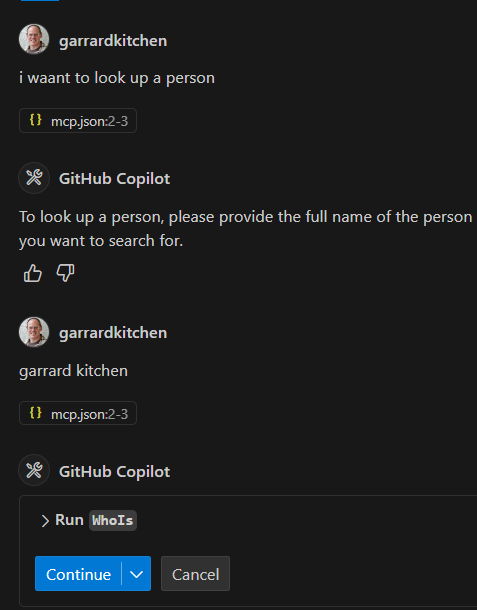
Now, go to your Agent pane. For example, you might ask the agent to look up a person. The agent may prompt you for more information:
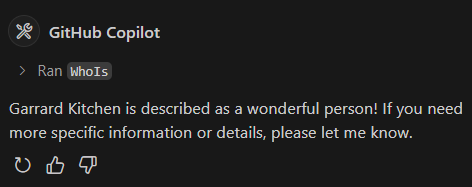
After providing the requested input and clicking continue, you’ll see the agent’s response:
Troubleshooting
If you’re not receiving the responses you expect, or if you want to test and interact with your MCP server(s) outside of the VSCode environment, you can use the MCP Inspector. This tool provides a user-friendly interface for testing and debugging your MCP servers. Access the MCP Inspector source code here.
To install the inspector, enter this into your terminal:
npx @modelcontextprotocol/inspector dotnet runThis then starts the MCP Inspector. Click on the HTTP URL to access the Inspector:
Starting MCP inspector...
⚙️ Proxy server listening on port 6277
🔍 MCP Inspector is up and running at http://127.0.0.1:6274 🚀
New SSE connection
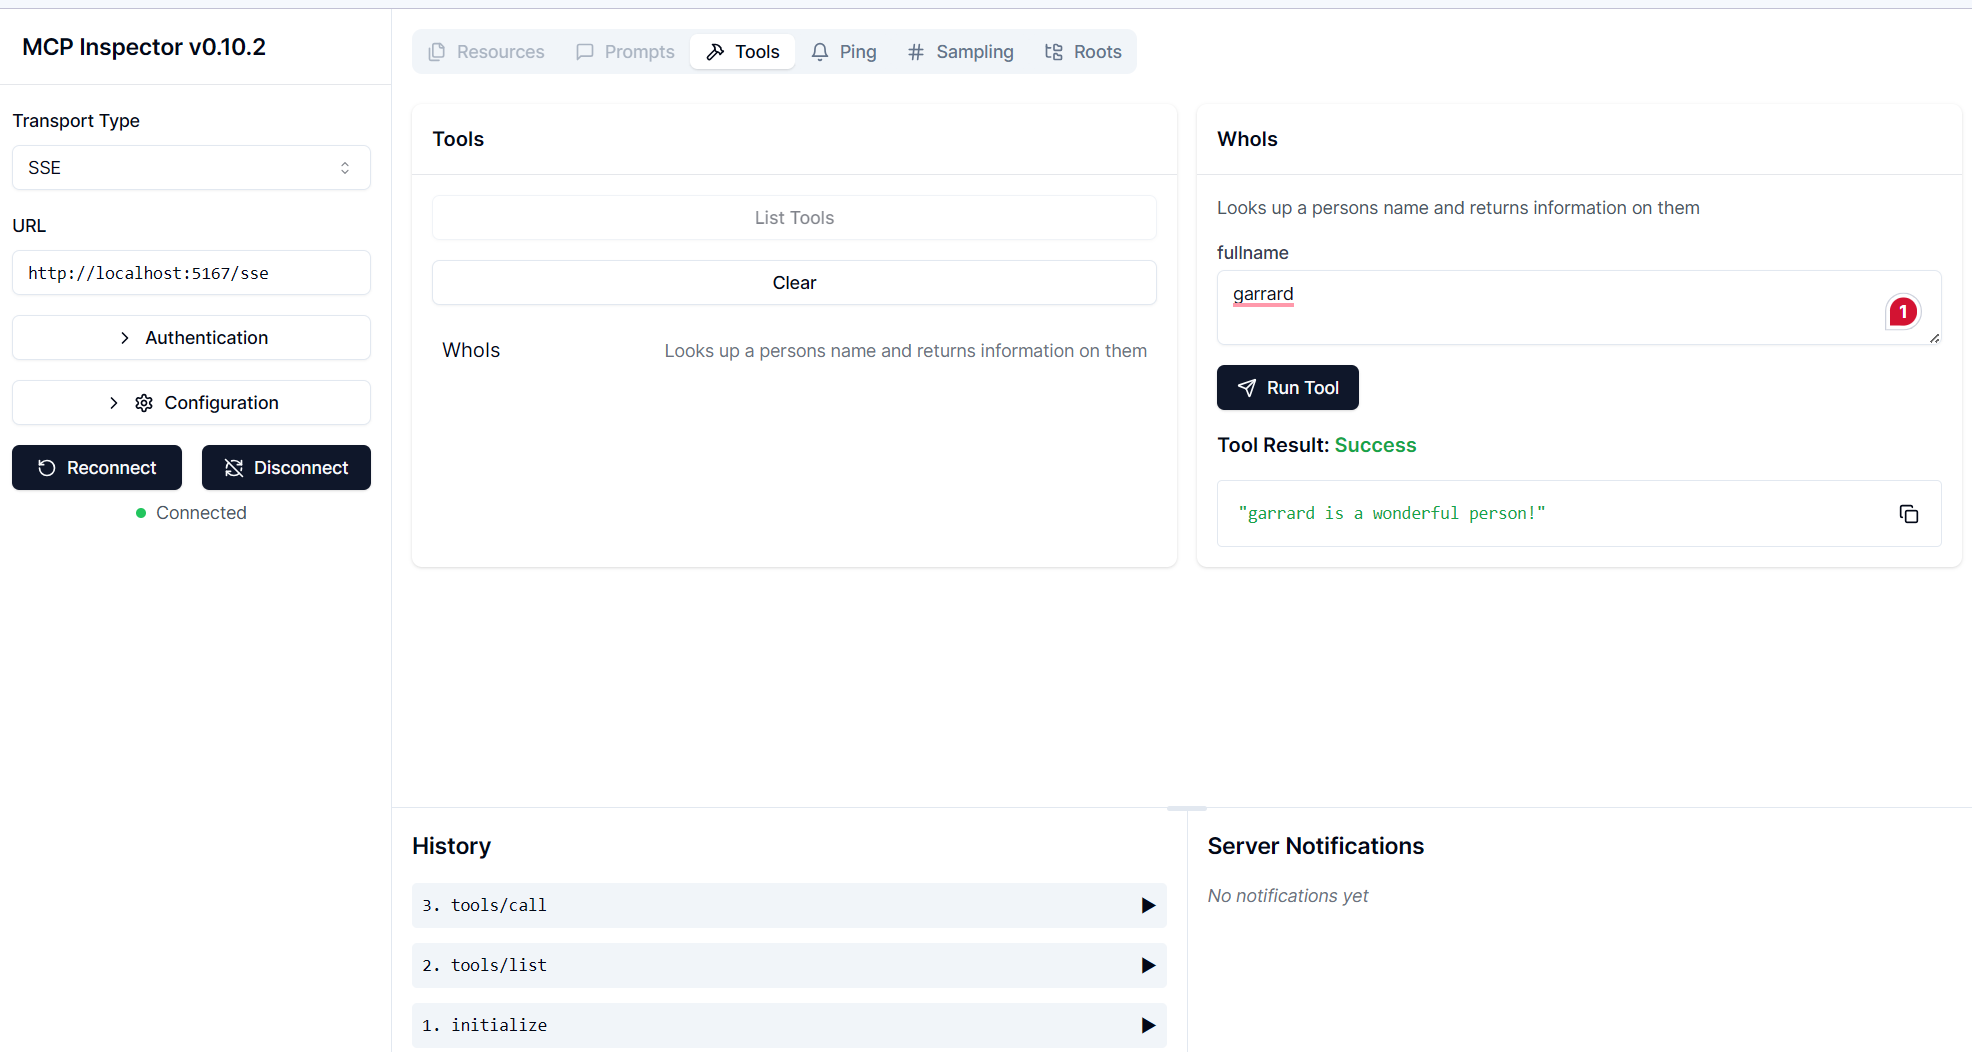
This is how my MCP Remote Server looks in the Inspector. I have listed the tools to review WhoIs and have enter my name to get a response:
How Does This Help?
By connecting an MCP server, you enable VSCode and its AI-powered extensions (like Copilot) to access richer, real-time context about your project. This leads to smarter, more relevant suggestions and a more seamless development experience.
Terminology
Model Context Protocol (MCP): An open standard for sharing workspace and project context between editors, AI tools, and services. Learn more.
Server-Sent Events (SSE):
In relation to MCP, SSE is a way for an MCP server to push real-time updates or context information to connected clients (such as editors or AI tools) over HTTP. With SSE, the server can continuously stream data—like file changes, user actions, or other context—without the client needing to repeatedly poll for updates. This enables efficient, low-latency communication and ensures that AI tools always have the latest context from the user’s environment.
In summary:
SSE allows an MCP server to broadcast context changes to clients in real time, improving the responsiveness and accuracy of AI-powered features in tools that support MCP.
2026 technical review
2026 update: use Streamable HTTP
The screenshots capture VS Code’s earlier remote-server flow. Current MCP uses Streamable HTTP for remote transport. The older HTTP+SSE transport is retained only for backwards compatibility in clients that support it; describing MCP as “HTTP pushing real-time events” is incomplete. The client sends JSON-RPC over HTTP POST, and the server may respond with JSON or an SSE stream. A standalone SSE endpoint is part of the legacy transport.
A remote endpoint must validate authentication and authorisation, not just accept a URL from mcp.json. Use HTTPS, current OAuth guidance, least-privilege scopes, and per-resource tenant checks. Validate Origin where relevant and do not use a session ID as an authentication token.
The Inspector is a development tool. Run it only from a trusted package source, keep its proxy bound to a safe interface, and avoid testing with production credentials. Successful tool discovery proves protocol compatibility; it does not prove that tool descriptions, argument validation, side effects, or access control are safe.
References
- Model Context Protocol (MCP) Website
- MCP GitHub Organization
- Server-Sent Events (MDN)
- Model Context Protocol specification
- VS Code: MCP servers
Closing thought
A green connection in VS Code proves that MCP messages can travel; trust begins only when the server’s tools, identities, side effects, and failure modes have also been examined.